Compared to every other video streaming site, YouTube provides users more features. Not only that, but youtube also provides users a few customization options like a modern look, classic look, multiple color themes, etc. If you have been using YouTube for a while, then you might know that YouTube provides users ‘Captions’ to understand the content in the videos better. The captions are just like Subtitles, which are found in every YouTube video. However, not many would know that YouTube also lets you personalize the caption fonts.
Here’s How You Can Personalize YouTube Caption Fonts
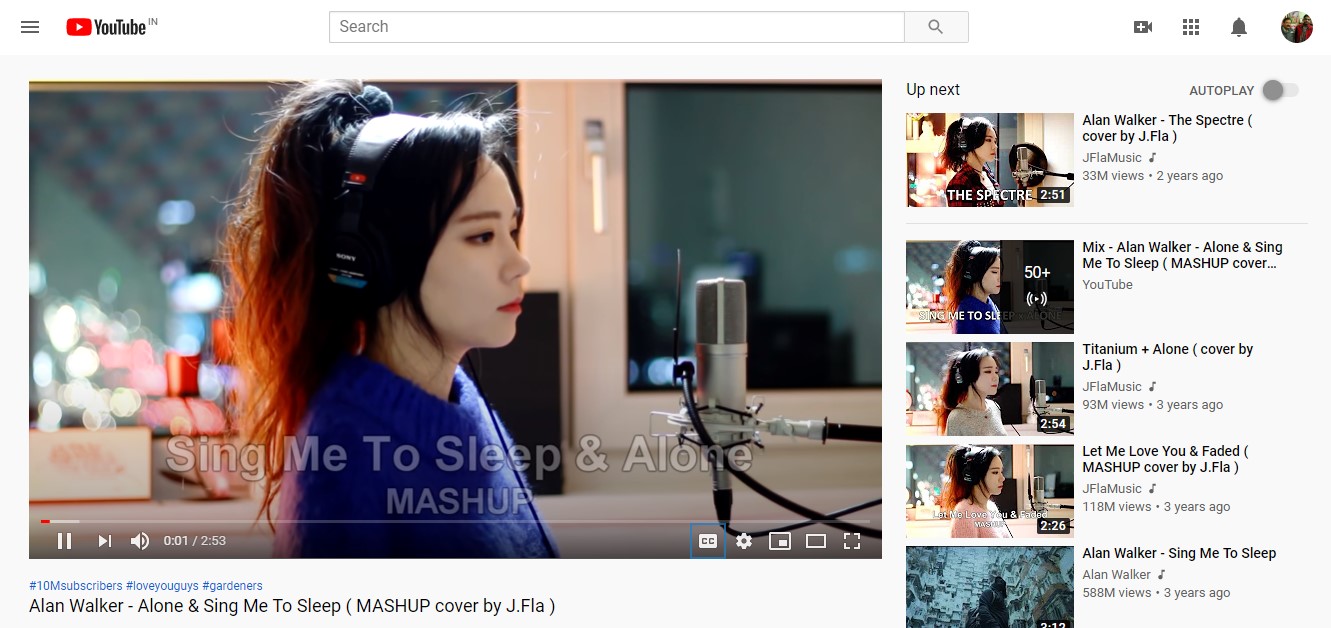
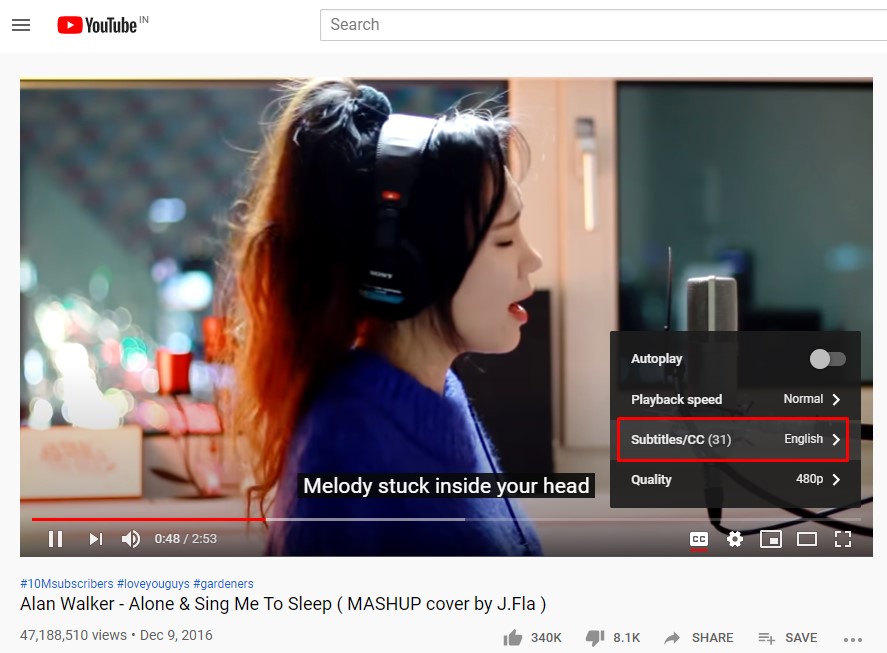
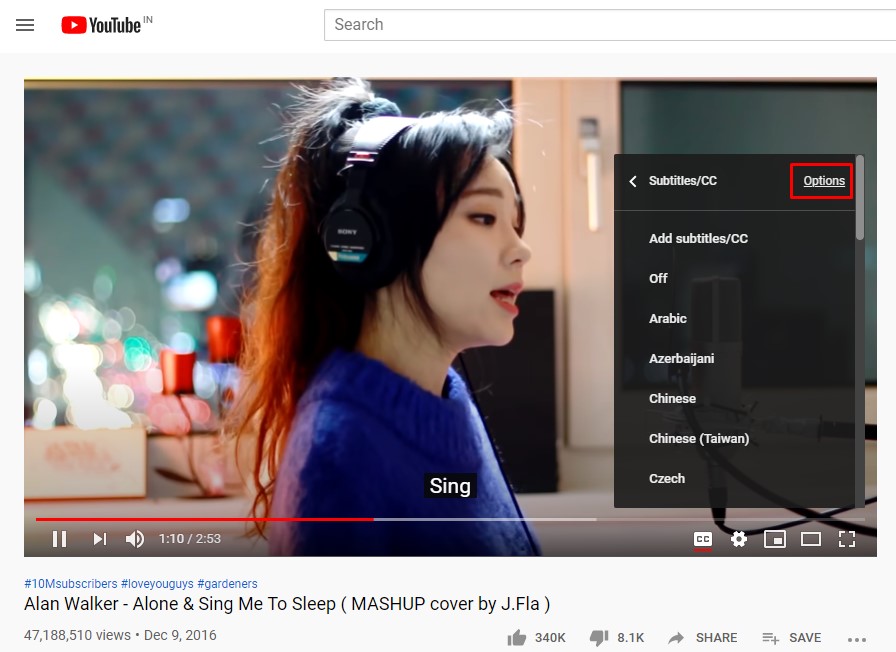
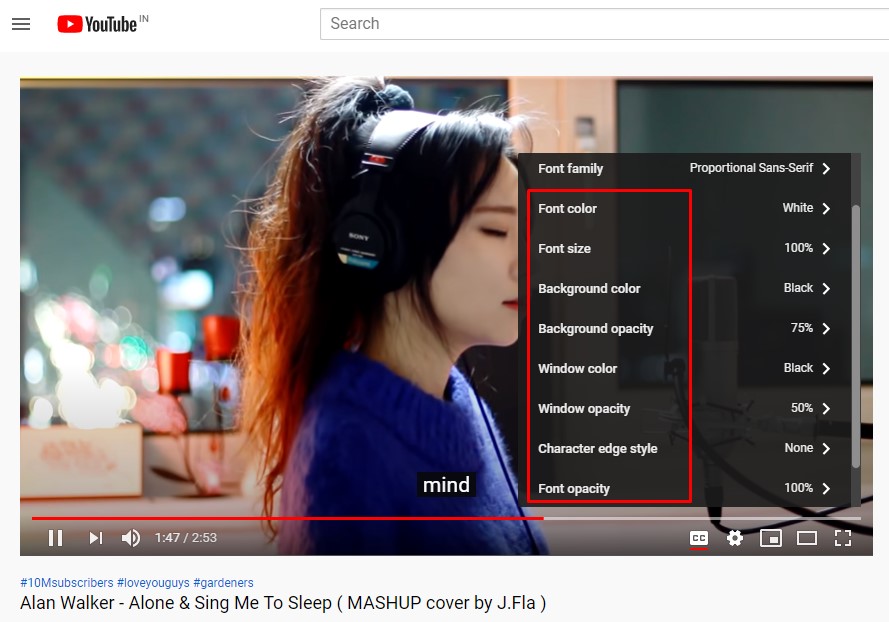
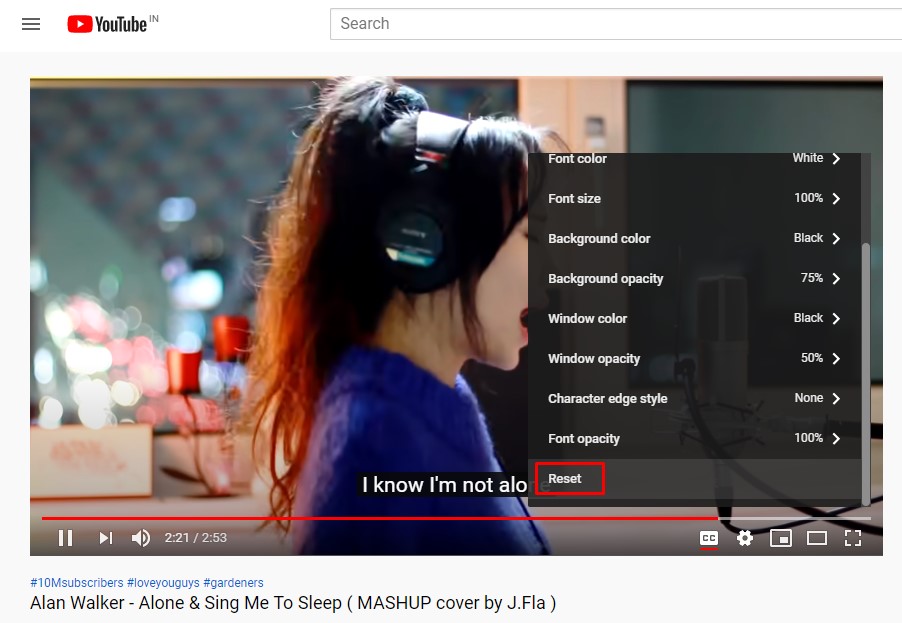
You can personalize the caption fonts to make them even easier to read. The feature is hidden under the settings, and this is why it often went unnoticed. So, in this article, we are going to share a method to personalize YouTube caption fonts on your PC. The good thing is that you don’t need to use any third-party app or extension to personalize the YouTube Caption fonts. So, let’s check out how to personalize YouTube Caption fonts in 2020. Step 1. First of all, open any video. Step 2. Now tap on the ‘Settings’ button, as shown on the screenshot below. Step 3. There you need to click on the ‘Subtitles/CC’ Step 4. Now you need to click on the ‘Options’ as shown on the screenshot below. Step 5. Now you will see lots of personalization options. You can change Font Family, Font Color, Font Size, Background Color, Opacity, Window Color, Font Opacity, etc. Step 6. Customize all options as per your wish. To reset the changes, simply click on the ‘Reset’ button. That’s it! You are done. This is how you can personalize YouTube Caption fonts on Windows 10 computers. I hope this article helped you! Share it with your friends also.
