Therefore, today we will discuss a method that will help you change the default language of your windows 10. The process is very simple and will offer you a collection of popular languages that you can set in your Windows 10. So have a look at the complete guide discussed below to proceed.
Steps to Add, Remove and Change Language In Windows 10
The method that we are going to discuss right here depends on the default language change feature in windows 10 that helps you to download a package of your favorite language and set it as a default language. Just follow some simple steps below to proceed.
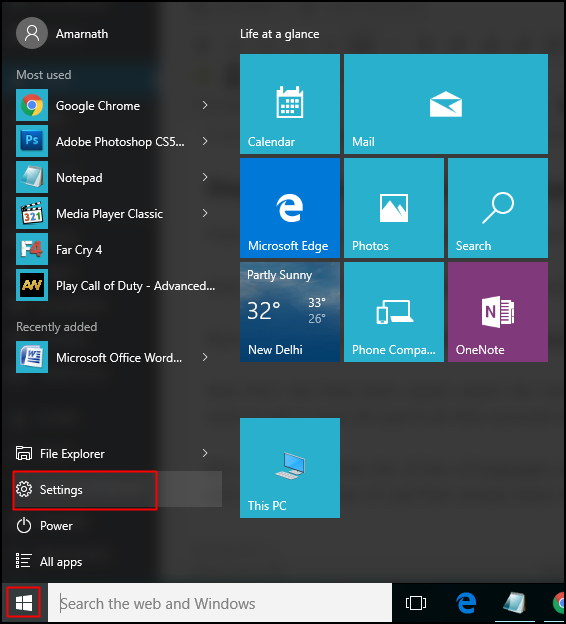
First of all, click on Windows and then click on Settings.
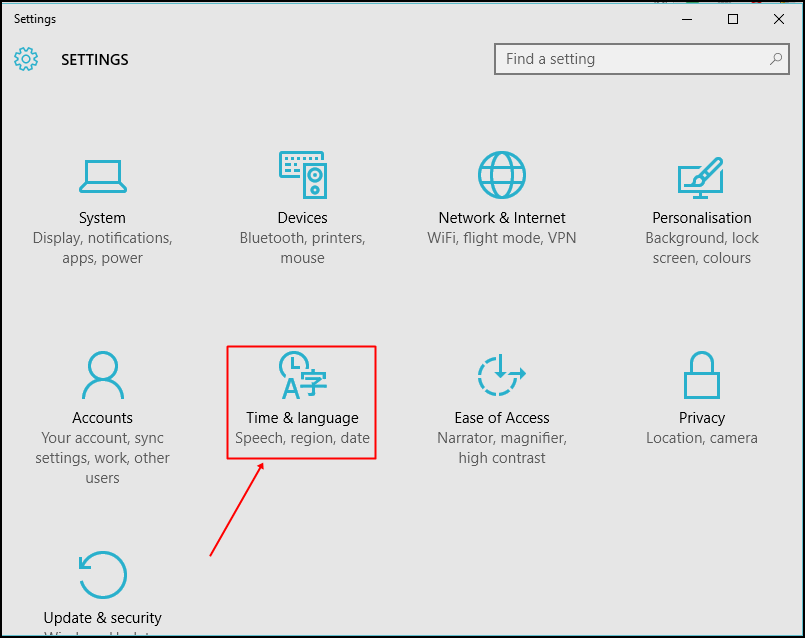
Now in settings, select the “Time & Language” option.
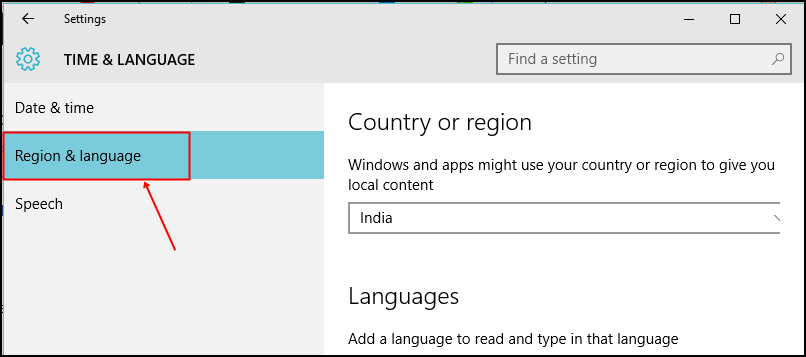
Now at the left section, choose Region & Language.
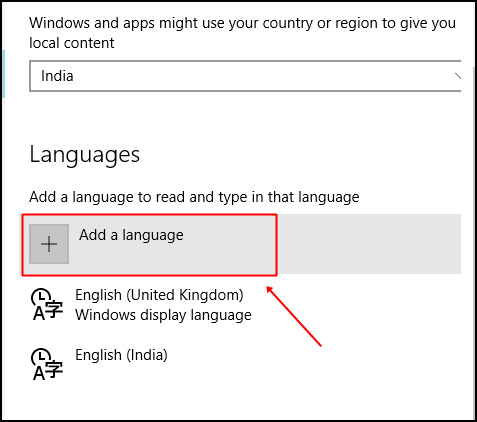
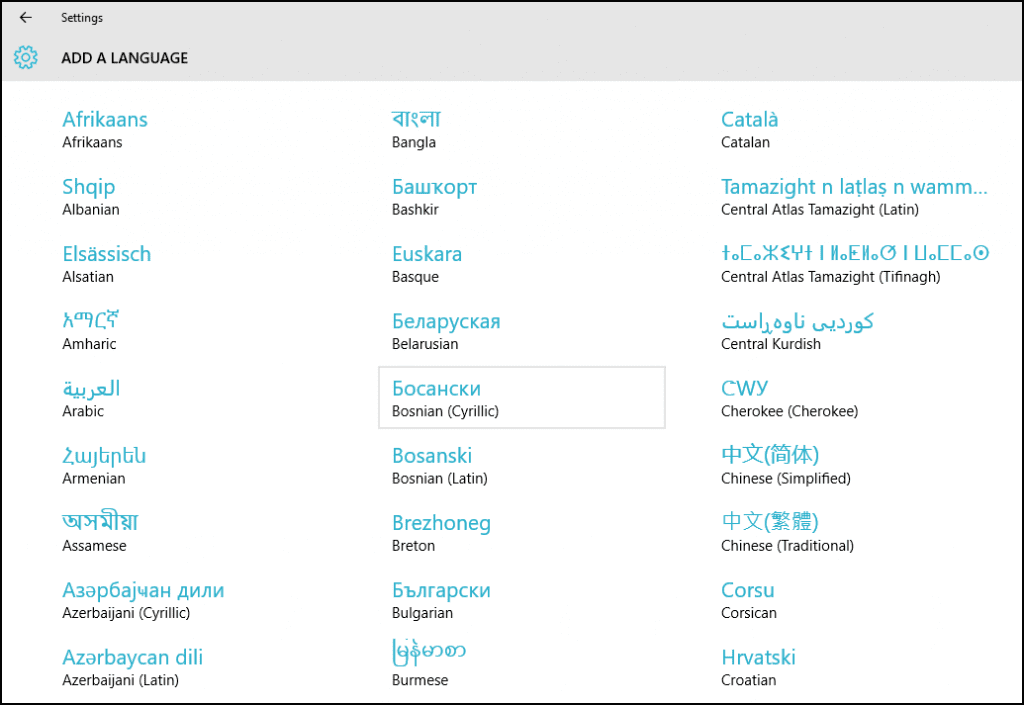
Now from the drop-down option, select the language. If your language is not there, click on Add a language.
Now you will see the list of languages you can download. Simply click on the Language pack to download it.
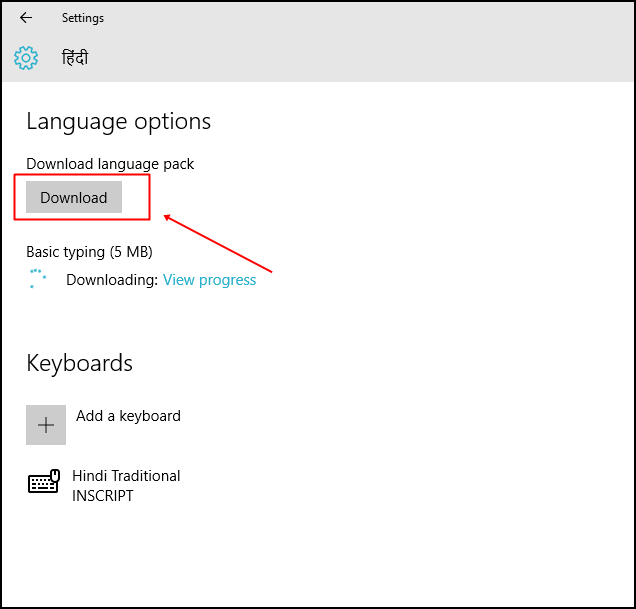
Now you will see that the language package will be available for that language click on it. You need to download the Language pack by simply clicking on it.
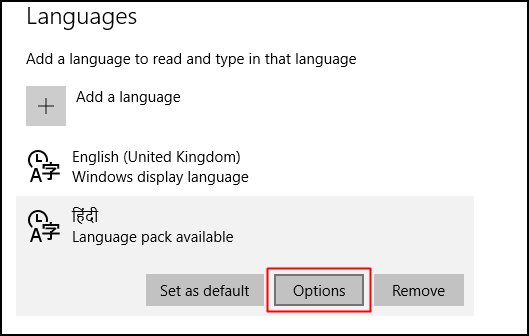
Now you will have three options for that language that are “Set as default“, “Options” and “Remove”. You need to click on the Set as Default.
That’s it! Now the language will successfully get added and set to your windows 10. So, the above guide is all about Add, Remove & Change Language in Windows 10. With this method, you can easily set any of your favorite languages as a default language in your OS and can even try some new languages also by just downloading their packages.
