If you care for your privacy, you might like to use something secure & private like DuckDuck Go or any other private search engine. Changing default searching on Chrome for desktop is easy, but things become pretty complicated for Android phone.
Steps to Change the Default Search Engine On Android device
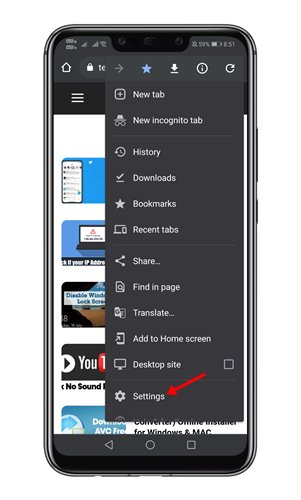
So, if you are interested in changing the default search engine on Android, you are reading the right article. In this article, we will share a detailed guide on how to change the default search engine on Android. Let’s check out. Step 1. First of all, open Google Chrome on your Android smartphone. Next, click on the three dots as shown below.
Step 2. From the list of options, tap on the ‘Settings‘
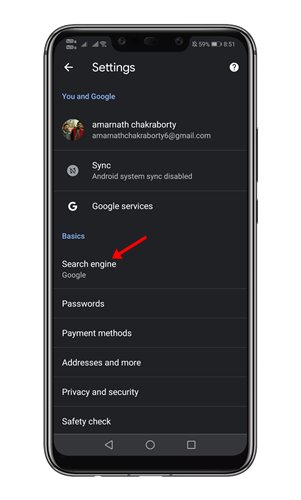
Step 3. On the Settings page, move to the basic tab and find the ‘Search Engine’ option.
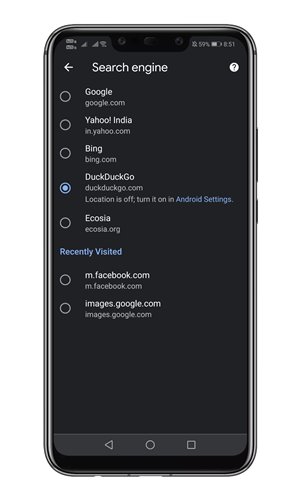
Step 4. Under the Search engine, you will find lots of options. Simply select one of your choices.
That’s it! You are done. This is how you can change the default search engine on Android.
Replace the Home Screen Widget
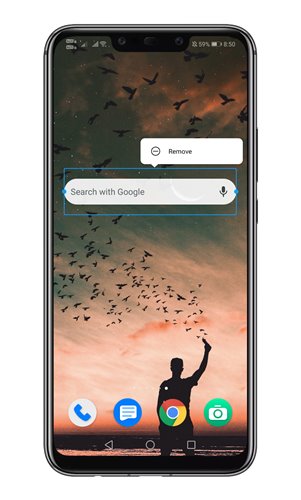
If you rely on the Google search widget to search the web, you can change that as well. In this method, we will show you how to add the DuckDuckGo search widget on Android. Let’s check out. Step 1. First of all, long-press the Google Search widget and tap on the ‘Remove‘ button.
Step 2. Now head to the Google Play Store and install the DuckDuckGo browser on your Android.
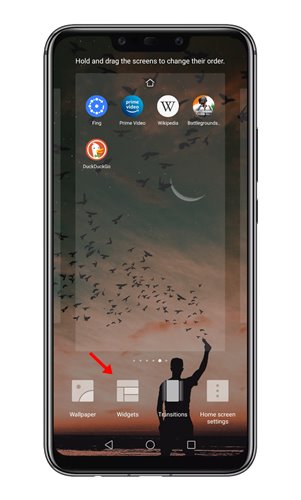
Step 3. Next, long press on the Android home screen and tap on ‘Widgets‘
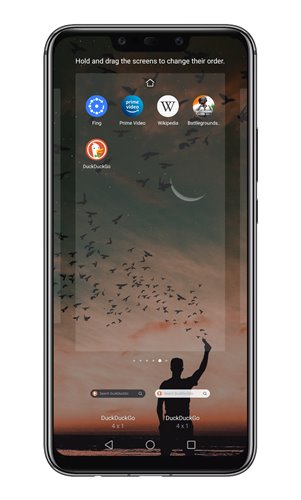
Step 4. On the Widgets, find the ‘DuckDuckGo‘ search widget.
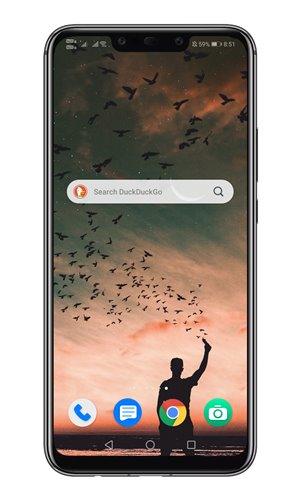
Step 5. Just drag and drop the widget to the home screen.
That’s it! You are done. This is how you can replace the Google Search widget with DuckDuck Go. So, this article is all about how to change the default search engine on Android. I hope this article helped you! Please share it with your friends also. If you have any doubts related to this, let us know in the comment box below.

