Recently, few Windows 10 users have reported that the Chrome browser automatically checks for updates upon the restart. Normally, the Chrome browser updates itself in the background, without affecting the system performance. However, if your PC has less RAM, then it can slow down or even freeze your computer.
Disable Automatic Chrome Updates in Windows
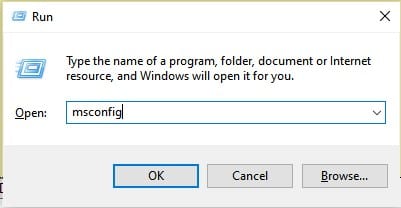
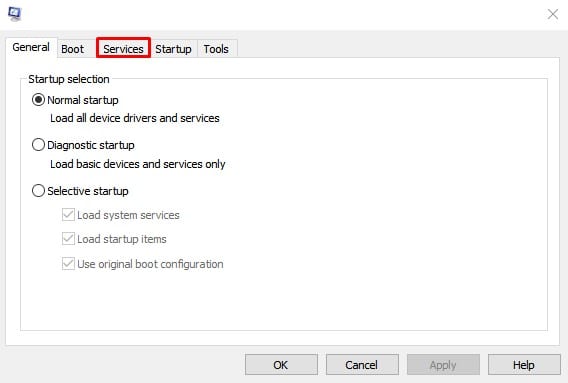
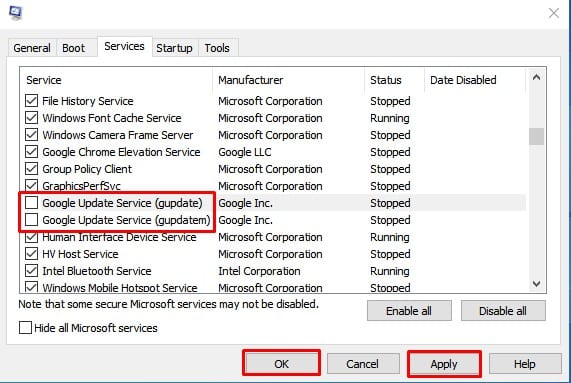
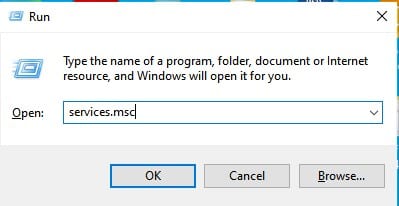
So, if you have a low-end computer, then you can choose to disable the Chrome automatic updates. Although Chrome doesn’t allow you to disable the automatic updates, it can be disabled through the System Configuration utility of Windows 10. So, in this article, we have decided to share a working method to stop automatic chrome updates on Windows 10 in 2020. Step 1. First of all, open the RUN dialog box and search for ‘msconfig’. Step 2. This will open the System Configuration utility. There you need to select the ‘Services’ tab. Step 3. Under the Services, you need to uncheck the following – Google Update Service (gupdate) and Google Update Service (gupdatem) Step 4. Once done, click on the ‘Ok’ button. Step 5. Now press Windows Key + R to open the RUN dialog box. There you need to type in ‘services.msc’ and hit Enter. Step 6. Under the Services, you need to disable the following services from the startup type menu – Google Update Service (gupdate) and Google Update Service (gupdatem). Note: Google warns against disabling the updates. Few updates are essential for your PC as they contain bug and security fixes. If you choose to disable the updates, you could end up missing out on critical security fixes. So, this article is all about how to stop automatic Chrome updates on Windows 10. I hope this article helped you! Share it with your friends also.