The feature is meant to improve the GPU scheduling process. If you enable this feature, you can expect better performance from apps that relies on your graphic card. With this feature enabled, specific programs/games that use the GPU will perform better. The feature was first released in Windows 10 but is now also available in Windows 11. Also read: How to Set Preferred GPU for Apps & Games in Windows 11
Steps to Enable Hardware-Accelerated GPU Scheduling in Windows 11
So, if you are looking for ways to enable the Hardware Accelerated GPU scheduling feature, you are reading the right guide. This article will share a step-by-step guide on enabling hardware-accelerated GPU scheduling on Windows 11. Let’s check out. Important: Before you enable this feature, make sure to update the operating system and the graphic drivers of your PC.
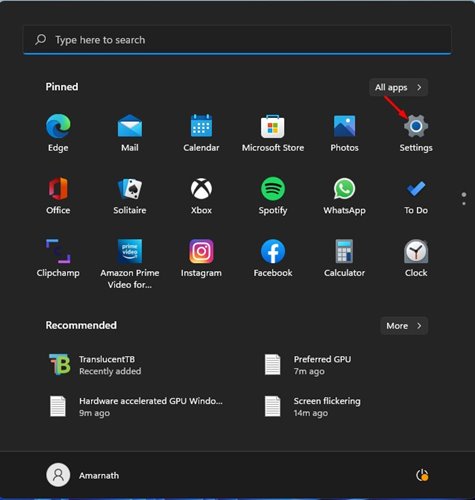
First of all, click on the Windows 11 Start button and select Settings.
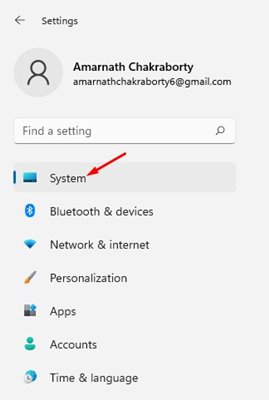
On the Settings page, click on the System section, as shown below.
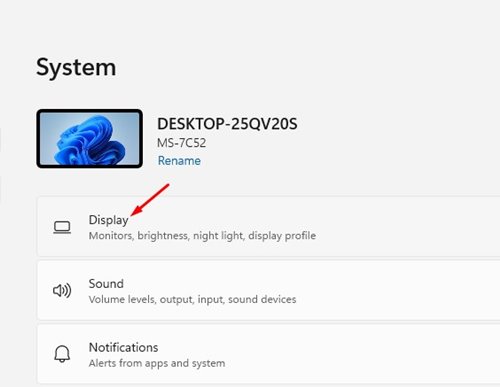
On the right pane, click on the Display option as shown in the screenshot below.
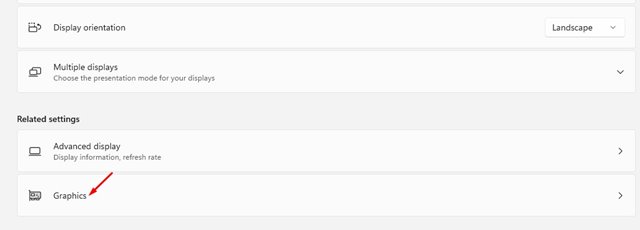
On the Display option, scroll down and click on the Graphics option under the Related settings.
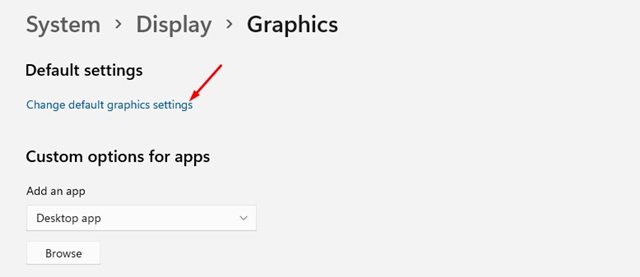
Under the graphics, click on the Change default graphics settings link under the Default Settings.
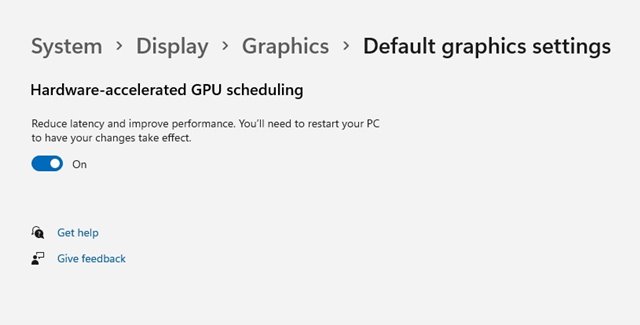
On the next screen, toggle on the switch behind Hardware-Accelerated GPU Scheduling. Then, on the confirmation prompt, click on the Yes button.
That’s it! You are done. This will enable the Hardware Accelerated GPU Scheduling on Windows 11. Make sure to restart your computer to apply the changes. Enabling hardware accelerated GPU scheduling is pretty easy on Windows 11. If you are not satisfied with the feature, you can disable it by reverting the changes you have made. I hope this article helped you! Please share it with your friends also. If you have any doubts related to this, let us know in the comment box below.
