This feature is available in the Windows 10 Professional. If you are using Windows 10 Pro, you can put your PC in Kiosk mode with assigned access.
Steps to Put a Windows PC into Kiosk Mode With Assigned Access
In this article, we have shared the method for letting you put a Windows PC into Kiosk mode with Assigned Access. Here’s what you need to do.
In the first step, you will have to make the user account for the assigned access on your Windows. To do that, log in with your Administrator account.
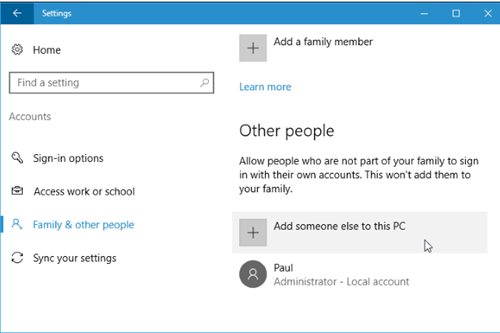
In Windows 10, open the settings app, navigate to Accounts > Family & Other People, and click on “Add Someone Else to This PC“. For Windows 8.1 users, go to Accounts > Other Accounts > Add an Account.
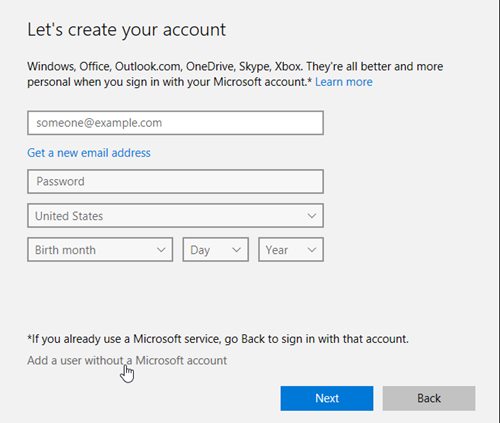
Next, select the ‘Add a user without a Microsoft account’ option and click on the Next button.
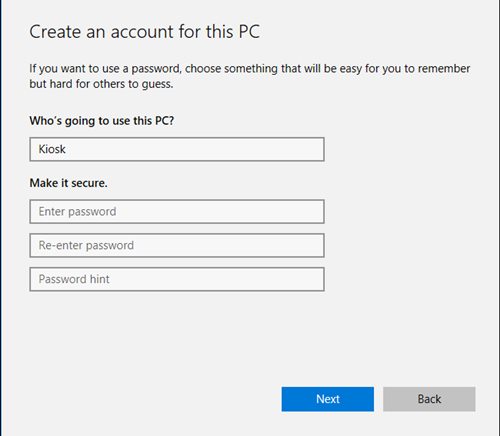
In Windows 10, select “I Don’t Have this Person’s Sign-In Information“. Next, enter the account’s name and set the password for that. In Windows 8.1, check for the “Sign In Without Microsoft Account” and then click “Local Account” to create the local account. The account created will have limited user permissions and system permissions too.
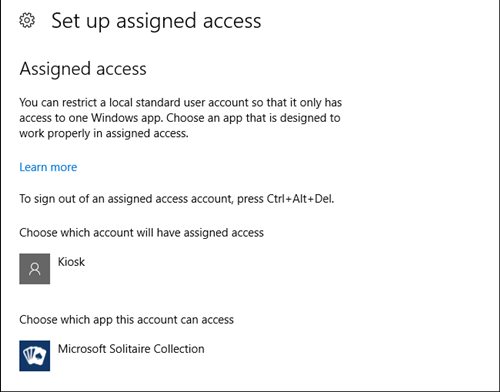
Now, on Windows 10, go to Settings > Family & other people, and click on the option stating “Setup Assigned Access“. On Windows 8.1, go to the PC settings > Accounts > Other Accounts and click “Setup Assigned Access”.
Select the apps you wish to grant in the assigned access mode. To sign out of an assigned access account, press the Ctrl+Alt+Delete button.
So, these are some easy steps that will let you put a Windows PC into Kiosk mode with assigned access. If you need more help on this topic, let us know in the comments below. Also, if the article helped you, share it with your friends.


